# Proxmox
Proxmox VE ist eine auf Debian basierende Open-Source-Virtualisierungsplattform zum Betrieb von virtuellen Maschinen mit einem Webinterface zur Einrichtung und Steuerung von x86-Virtualisierungen.
# LXC Container Root PW zurücksetzen
To reset the root password in an LXC container, you can use the lxc-attach command to gain access to the container’s shell, where you can then change the password.
1. Identify Your Container: First, list all available containers to identify the one you need to access:
```
lxc-ls --fancy
```
2. Attach to the Container: Use the lxc-attach command followed by the container name to attach to the container’s shell:
```
lxc-attach -n container_name
```
3. Reset the Root Password: Once attached, use the passwd command to change the root password:
```
passwd
```
You’ll be prompted to enter and confirm the new password.
1. Exit the Container: Type exit to leave the container shell.
# VMID ändern
### LVM-Thin
Backups werden bei diesen Schritten nicht umbennent und müssen manuell umbennent werden.
Bevor die nächsten Schritte durchgeführt werden. Muss die VM heruntergefahren werden.
#### Anzeigen der virtuellen Disken
Mit dem Befehl `lvs` werden alle LVM Disken angezeigt:
```bash
lvs
```
```bash
LV VG Attr LSize Pool Origin Data% Meta% Move Log Cpy%Sync Convert
data pve twi-aotz-- 1.71t 13.67 0.54
root pve -wi-ao---- 96.00g
swap pve -wi-ao---- 8.00g
vm-101-disk-0 pve Vwi-aotz-- 4.00m data 14.06
vm-101-disk-1 pve Vwi-aotz-- 100.00g data 75.88
vm-101-disk-2 pve Vwi-aotz-- 4.00m data 1.56
vm-1022-disk-3 pve Vwi-a-tz-- 4.00m data 1.56
vm-1030-disk-0 pve Vwi-aotz-- 4.00m data 14.06
vm-1030-disk-1 pve Vwi-aotz-- 32.00g data 100.00
vm-1031-disk-0 pve Vwi-aotz-- 4.00m data 14.06
vm-1031-disk-1 pve Vwi-aotz-- 32.00g data 100.00
vm-1040-disk-0 pve Vwi-aotz-- 4.00m data 14.06
vm-1040-disk-1 pve Vwi-aotz-- 100.00g data 100.00
```
#### Umbennen einer Disk
Mit dem Befehl `lvrename` kann die Disk unbennt werden.
```bash
lvrename pve/vm-1022-disk-3 pve/vm-1040-disk-3
```
#### VM Konfiguration Datei anpassen
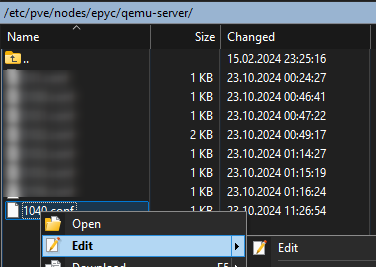
Diese Schritte können auch mit einem GUI durchgeführt werden. Bspw. WinSCP
Anschliessend müssen nun die IDs der Disken in der `[vmid].conf` anngepasst werden, diese befindet sich im Pfad `/etc/pve/nodes/host/qemu-server`.
```
cd /etc/pve/nodes/epyc/qemu-server
ls
```
```
nano 1022.conf
```
Alle Disk Einträge müssen dann angepasst werden in unserem Beispiel sind es folgende:
```
efidisk0: local-lvm:vm-1040-disk-0,efitype=4m,format=raw,size=528K
scsi0: local-lvm:vm-1040-disk-1,cache=writeback,format=raw,iothread=1,size=100G,ssd=1
```
##### WinSCP
[](https://docs.corestream.ch/uploads/images/gallery/2024-10/znGdpwp4q35lz7Vb-image.png)
#### Konfigurationsdatei umbennen
Zum Schluss muss noch die Konfigurationsdatei selbst mit der auf die neue ID umbennent werden:
```
mv 1022.conf 1040.conf
```
### ZFS
**ZFS:**
Hier heißt der Befehl `zfs list`. Der Name der VM sähe wahrscheinlich so in der Art aus:
```
NAME USED AVAIL REFER MOUNTPOINT
rpool/data/vm-100-disk-0 56K 736G 56K -
```
Und lässt sich mit `zfs rename` umbenennnen:
```
zfs rename rpool/data/vm-101-disk-0 rpool/data/vm-1001-disk-0
```
# Backup Log bereinigen
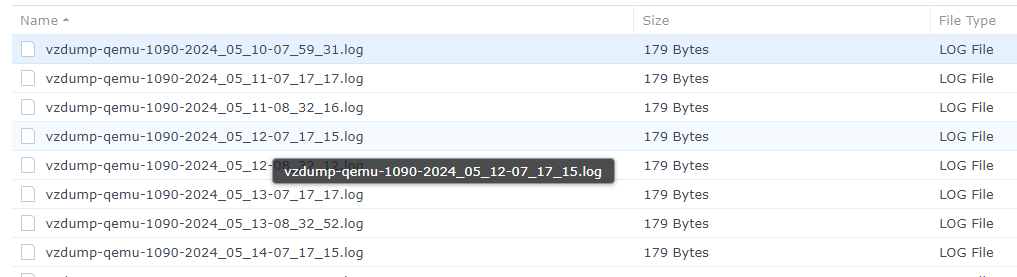
[https://forum.proxmox.com/threads/cleaning-up-log-files-from-old-backups.22929/](https://forum.proxmox.com/threads/cleaning-up-log-files-from-old-backups.22929/)
[](https://docs.corestream.ch/uploads/images/gallery/2025-01/AmG34ogy0XO7C8BM-image.png)
# Proxmox Backup Server
# How To: Setup Synology NFS for Proxmox Backup Server Datastore
[https://www.derekseaman.com/2023/04/how-to-setup-synology-nfs-for-proxmox-backup-server-datastore.html](https://www.derekseaman.com/2023/04/how-to-setup-synology-nfs-for-proxmox-backup-server-datastore.html)
# Cluster Node entfernen
# Cluster auflösen
# VM- und LXC-Konfiguration aus dem RAM wiederherstellen
# Extend LVM after VM Disk resize
To extend LVM in a Linux VM after a disk resize in Proxmox, resize the partition, expand the Physical Volume (
), and extend the Logical Volume (

). The core commands to run inside the VM are `growpart /dev/sda 2` (adjust device), `pvresize /dev/sda2`, and `lvresize -l +100%FREE /dev/mapper/vg-lv`.
Steps to Extend LVM After Proxmox Disk Resize
1. **Resize Disk in Proxmox:** Go to the VM's **Hardware** tab, select the hard disk, click **Resize**, and add the desired amount.
2. **Scan for New Space (Inside VM):** The VM might not see the space immediately. Rescan the SCSI bus:```
echo 1 > /sys/class/block/sda/device/rescan
# Replace sda with your disk identifier found via lsblk
```
3. **Expand Partition (If needed):** Use `growpart` to expand the partition containing the LVM PV. For example, if LVM is on `/dev/sda2`:```
growpart /dev/sda 2
```
*If `growpart` is not installed, use `apt install cloud-utils-growpart` or `yum install cloud-utils-growpart`*.
4. **Resize Physical Volume (PV):** Tell LVM the partition is larger:```
pvresize /dev/sda2
```
5. **Extend Logical Volume (LV):** Extend the LVM to use all new free space:```
lvextend -l +100%FREE /dev/mapper/vgname-lvname
# Use 'lvs' to find your correct volume group/logical volume name
```
6. **Resize Filesystem:** Update the filesystem to use the new space.
- **For ext4:** `resize2fs /dev/mapper/vgname-lvname`
- **For XFS:** `xfs_growfs /`